The Plugins option in the Players module can be used to add a player plugin, stylesheet or add a script to a Brightcove Player. The Plugins page will list all plugins that have been configured for the player. Brightcove provided plugins will not be displayed (i.e. Social, Audience, etc.).
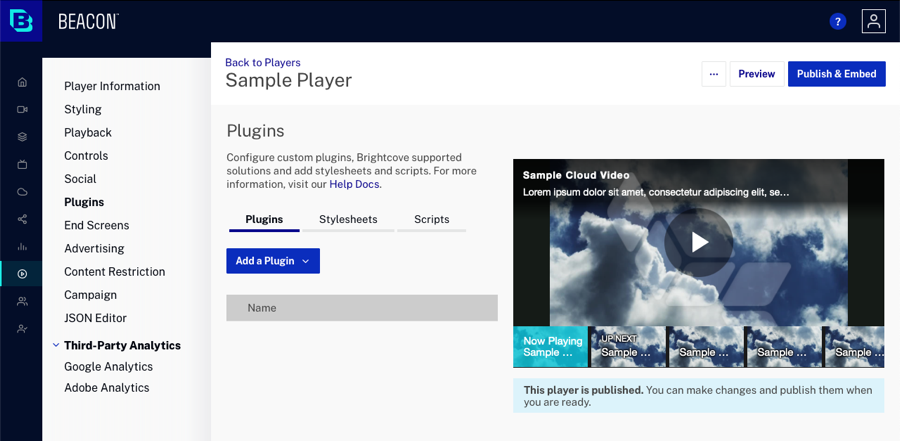
Configuring a player plugin
Plugins are typically developed to:
- Modify the default behavior of a player
- Add functionality to a player
- Customize player appearance
For information on creating your own custom plugins, see Step-by-Step: Plugin Development.
To configure plugins for the player, follow these steps:
- Open the Players module.
- Click the link for the player you want to configure.
- Click Plugins in the left navigation menu.
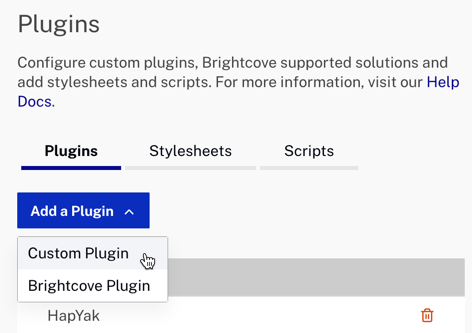
- Click and then click on a plugin type:
- Custom Plugin - Plugin developed by you or a third party
- Brightcove Plugin - Plugin developed and provided by Brightcove
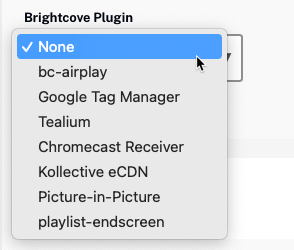
- For Brightcove Plugins, select a Brightcove Plugin from the list. Note that all available Brightcove plugins are not available in the list. For a list of all Brightcove provided plugins, see the Brightcove Player Plugins topic.
- For Custom Plugins, enter the following:
- Plugin Name - As defined in the plugin JavaScript file
- JavaScript URL - Provide a URL to the file that contains the plugin code
- CSS URL - Provide a URL to the file(s) that contain(s) the CSS code used by the plugin. Be sure you supply valid CSS. If you supply non-valid CSS, you will see an error in the preview window.
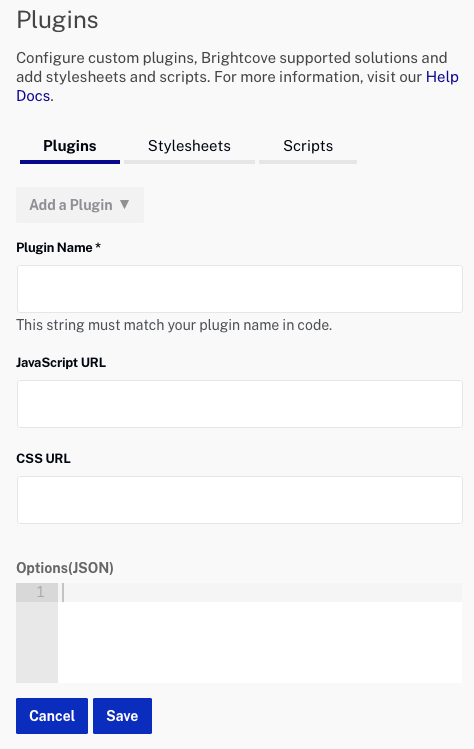
- The Options (JSON) field can be used to paste in JSON formatted options for both plugin types. For Brightcove plugins, the available options are outlined in the plugin documentation. For custom plugins, the options usage is shown in the plugin JavaScript code.
- Click to save the changes.
To edit any of the plugin properties, click on the plugin name. To delete the plugin, click the delete icon (![]() ).
).
Adding a stylesheet
A CSS file can be uploaded to customize the player appearance.
To add a CSS file to the player, follow these steps:
- Open the Players module.
- Click the link for the player you want to configure.
- Click Plugins in the left navigation menu.
- Click the Stylesheets link.
- Click Add a Stylesheet.
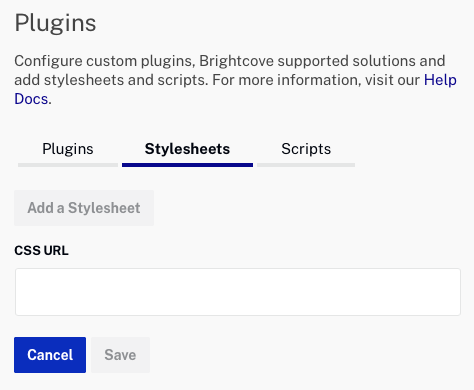
- Provide a URL to the CSS file.
- Click to save the changes.
To edit the file path, click on the file name. To delete the file, click the delete icon (![]() ).
).
Adding a script
A script file can be uploaded to customize the player appearance.
To add a script file to the player, follow these steps:
- Open the Players module.
- Click the link for the player you want to configure.
- Click Plugins in the left navigation menu.
- Click the Scripts link.
- Click Add a Script.
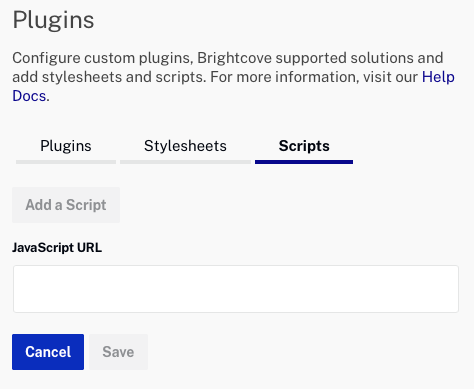
- Provide a URL to the JavaScript file.
- Click to save the changes.
To edit the file path, click on the file name. To delete the file, click the delete icon (![]() ).
).
Plugin code location
When a plugin, be it a Brightcove supplied plugin or a custom plugin you have built, is added to the player as shown above, or using the Player Management API, the plugin becomes part of the player code itself. The plugin code is retrieved from its storage location on the Internet and made part of the code for the specific player to which the plugin was added. To illustrate this further, when you use the Advanced (in-page) player implementation you see a <script> tag similar to the following:
<script src="//players.brightcove.net/1507807800001/default_default/index.min.js"></script>
This is the code that defines your Brightcove Player. This file includes code for any of the plugins you have added to the player. The plugin code is also included in the Standard (iframe) player implementation.
If you develop your own plugin and change the source code in its Internet storage location, be sure you re-publish your player as the new plugin code will NOT be part of the JavaScript file unless you do so.
For information on creating plugins, see the Step-by-Step: Plugin Development developer document.

